Coming up with design ideas for plasma cutting projects is half the battle. Maybe you have a customer requesting a custom metal sign but no vector file to start from. Maybe you want to prototype a decorative wall art piece but don't have the illustration skills to draw it from scratch. Or maybe you just want to explore new ideas quickly without spending hours in a design tool.
That's exactly the problem CutArc's AI Design Generator solves. Type a short description of what you want, and the AI creates a plasma-ready SVG design in seconds. No drawing required, no file downloads to manage, no format conversions. The generated design lands directly on your CutArc canvas, ready for toolpath generation and cutting.
This guide covers everything you need to know to get the most out of the feature — from accessing it for the first time to writing prompts that produce clean, cuttable results.
What Is the AI Design Generator?
The AI Design Generator is a built-in CutArc feature that converts plain text descriptions into ready-to-cut SVG designs. You describe what you want in a sentence or two — something like "eagle silhouette wall art with spread wings" — and the AI produces a vector design optimized for plasma cutting.
Unlike general-purpose AI image generators that produce photographs or detailed illustrations, CutArc's generator is specifically trained and tuned for plasma cutting workflows. It understands the constraints of the medium: designs need to be silhouette-based, text needs stencil-style bridges, and paths need to be closed and continuous. The output isn't a raster image that needs tracing — it's a clean SVG with proper vector paths that you can scale, edit, and cut immediately.
This makes it fundamentally different from downloading a design off the internet and importing it. Internet designs are rarely plasma-ready. They often have open paths, internal detail lines, thin features that would melt, and text without bridges. The AI Design Generator skips all of those problems by producing output that's purpose-built for the plasma cutting process.
How to Access the AI Design Generator
Getting started takes just a few clicks. Here's the step-by-step process:
- Open CutArc by navigating to cutarc.io in your browser. No installation or download is needed.
- Find the AI Generate button in the toolbar. It's the purple button labeled "AI Generate" — you can't miss it.
- Click the button to open the generation dialog. You'll see a text input field where you can describe your design.
- Type your description. Be specific about what you want. A sentence or two is ideal. (More on writing good prompts below.)
- Click Generate. The AI will process your request and produce a design. This typically takes a few seconds.
- Preview the result. You'll see a preview of the generated SVG before it touches your canvas. Take a moment to evaluate it.
- Click Add to Canvas if you're happy with the result. The design will be placed on your workspace, where you can scale, position, and edit it like any other element.
If the result isn't what you had in mind, you can adjust your prompt and generate again. Each generation uses one credit, so it's worth taking a moment to refine your description before clicking Generate.
Free Credits and Paid Credit Packs
Every CutArc user gets 1 free AI generation per week. This resets automatically, so you can experiment with the feature at no cost on an ongoing basis. It's a good way to try out the generator, test a quick idea for a customer, or produce a one-off design for a personal project.
If you need more than one generation per week — whether you're running a sign-making business, prototyping multiple design concepts for a client, or just iterating on a complex piece — you can purchase credit packs:
| Credit Pack | Price | Per Credit |
|---|---|---|
| 10 credits | $4.99 | $0.50 |
| 50 credits | $19.99 | $0.40 |
| 200 credits | $59.99 | $0.30 |
Purchased credits never expire. One credit equals one generation. The larger packs offer a lower per-credit cost, which makes sense if you plan to use the generator regularly.
Writing Better Prompts
The quality of your AI-generated design depends heavily on how you describe it. A vague prompt produces a vague result. A specific, well-structured prompt produces a clean design that's close to what you envisioned. Here are the key principles for writing prompts that work.
Be Specific About Your Subject
Don't just name the subject — describe the specific composition you want. "Eagle" is too vague and could produce anything from an eagle head to a full body in any pose. "Eagle silhouette wall art with spread wings" tells the AI exactly what you need: a full eagle, wings extended, in a silhouette style suitable for wall display.
Include Context Words for Plasma Cutting
The AI understands plasma cutting context, but you'll get better results if you reinforce it in your prompt. Include words like:
- "silhouette" — tells the AI to produce an outer-contour design without internal detail lines
- "wall art" — signals a decorative piece meant to hang on a wall, which influences proportions and composition
- "metal sign" — tells the AI to create a sign-style layout, often with a border or frame
- "stencil" — important for text, ensures letters have bridges so they don't fall out when cut
Add Style Modifiers
Style words help guide the level of detail and aesthetic. Consider including:
- "simple" or "minimalist" — fewer details, bolder shapes, generally easier to cut
- "bold" — thicker lines and more prominent features, which hold up better in thinner materials
- "detailed" — more intricate design, better for thicker materials that can support fine features
- "geometric" — clean lines, angular shapes, symmetrical patterns
Specify Text Clearly
If your design includes text — a name on a welcome sign, a house number, a custom phrase — spell it out exactly in your prompt. The AI will render the text in a stencil style with bridges by default. For example: "Welcome sign with the name SMITH in stencil letters" tells the AI precisely what text to include and how to render it.
Keep It Concise
A sentence or two is the sweet spot. Long, rambling prompts with conflicting instructions tend to confuse the AI and produce messy results. State what you want clearly and move on. If the first result isn't right, it's better to refine and regenerate than to pack every possible instruction into a single prompt.
Understanding Plasma-Ready Designs
One of the biggest advantages of CutArc's AI generator over generic design tools is that it produces output specifically optimized for plasma cutting. Here's what that means in practice.
Silhouette-Style Output
Generated designs are silhouette-based, meaning they consist of outer contours that define the shape of the piece. This is exactly what a plasma cutter needs — a path to follow that separates the part from the surrounding material. You won't get photorealistic renders or gradient-filled illustrations that would be impossible to cut.
Stencil-Style Text with Bridges
When you include text in your prompt, the AI renders it in a stencil style. This means letters like O, A, D, B, and others that have enclosed interior sections include small connecting bridges that keep the interior piece attached to the surrounding material. Without bridges, the interior of an "O" would fall out as soon as the cut is complete. The AI handles this automatically.
No Internal Detail Lines
A common problem with designs sourced from the internet is internal detail lines — decorative lines within a shape that would cause the plasma to cut through the part itself. The AI avoids this by generating clean shapes without internal cut paths that would compromise structural integrity.
Closed, Continuous Paths
Every path in a generated design is closed, meaning the start point connects back to the end point. Open paths — where a line just stops without connecting — are a frequent issue with imported files and can cause problems during toolpath generation. The AI ensures all geometry is properly closed and ready for G-code generation.
Important: Always Review Before Cutting
AI-generated designs are a starting point, not a guaranteed final product. The generator is good — often very good — but it is not perfect. Every design should be reviewed and potentially adjusted before you send it to your plasma table. Here's what to check.
Check for Thin Bridges
Bridges in stencil text and connecting elements between parts of the design need to be wide enough to survive the heat of plasma cutting. A bridge that looks fine on screen might be only a fraction of a millimeter wide — far too thin for most plasma setups. If you spot narrow bridges, use CutArc's editing tools to widen them before generating your toolpath.
Verify Minimum Feature Sizes
Your material thickness and plasma setup determine the smallest features you can reliably cut. As a general rule, features should be at least 1.5 to 2 times the kerf width of your plasma system. For a typical setup with a 0.060" kerf, that means no features smaller than about 0.090" to 0.120". Zoom in on your generated design and check that all elements meet this threshold.
Look for Disconnected Islands
An "island" is a piece of the design that isn't connected to the main body. In a plasma-cut part, islands fall through the slats of your cutting table as soon as they're cut free. Sometimes this is intentional (the island is waste), but sometimes the AI creates a design element that should be connected but isn't. Scan the design for any floating sections and add bridges or connections as needed.
Test Cut on Scrap Material
Before committing to your good material, run the design on a piece of scrap that matches your target thickness. This lets you verify that all features survive the cutting process, that bridges hold, and that the overall proportions work at full scale. A test cut takes a few minutes and can save you from wasting a full sheet of steel.
Use CutArc's Editing Tools to Adjust
If anything in the generated design needs adjustment, you don't need to switch to a separate editor. CutArc's built-in tools let you select, move, scale, and modify paths directly on the canvas. You can add material to thin bridges, remove problematic features, adjust spacing, and fine-tune the design until it's exactly right for your application and setup.
Prompt Examples
Here are concrete prompt examples you can use as-is or adapt for your own projects. Each includes a description of the kind of output you can expect.
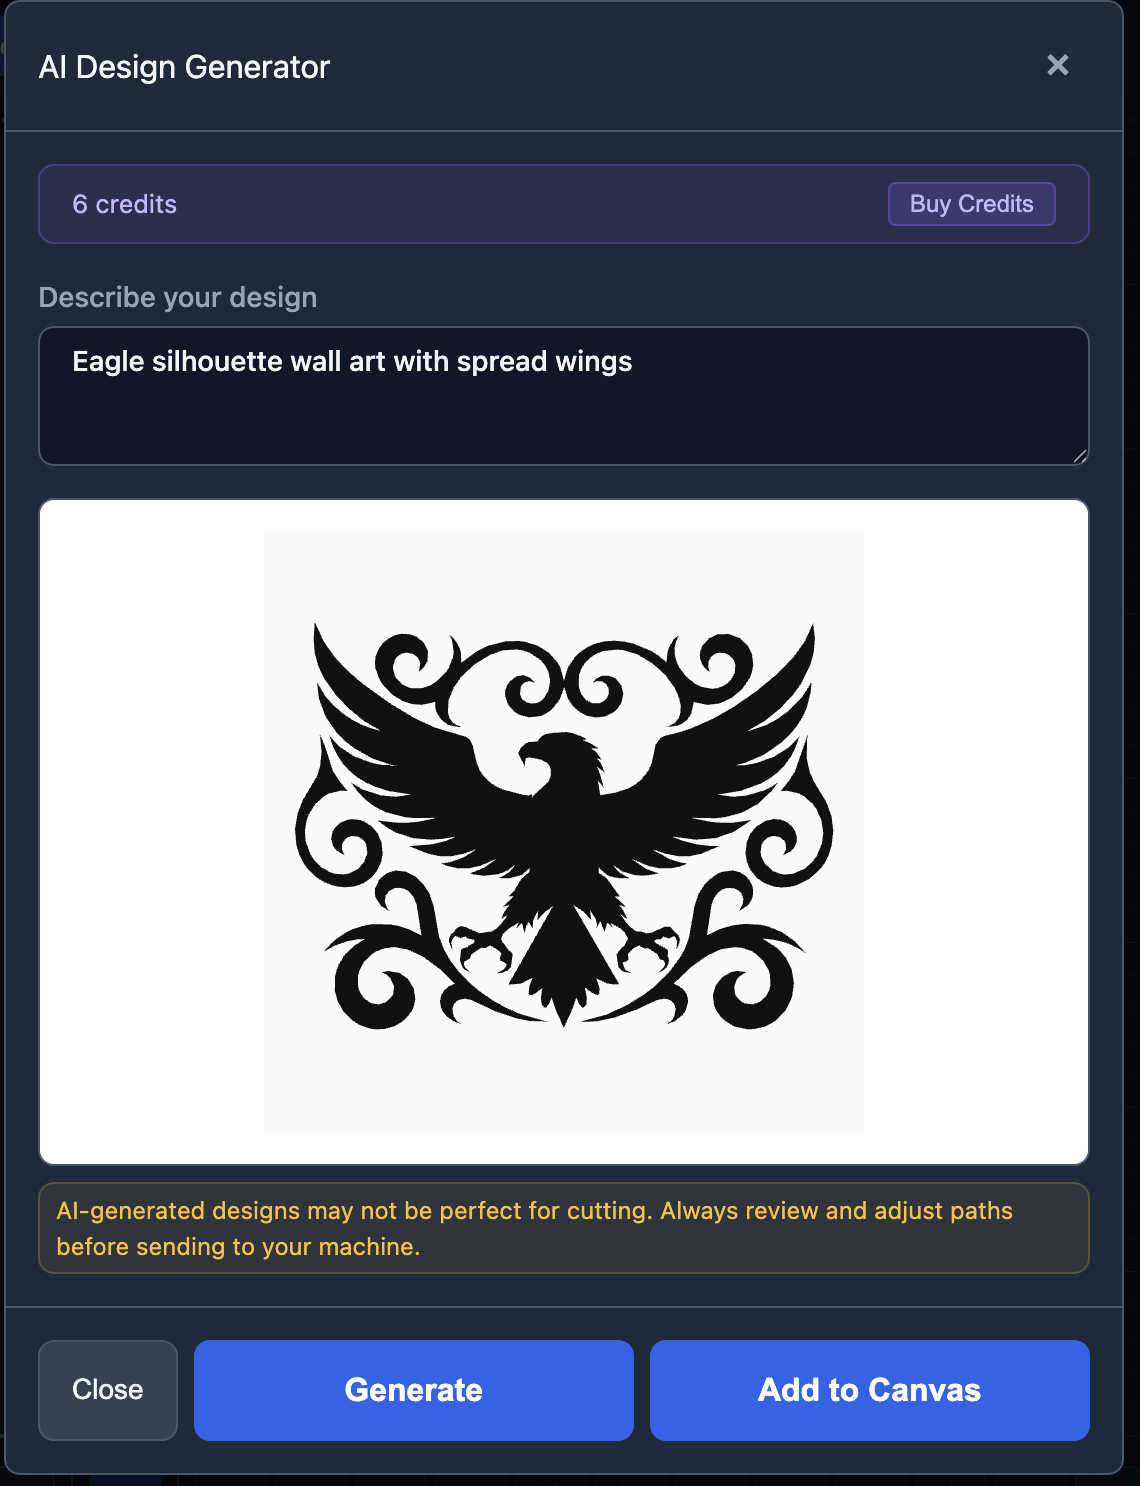
"Eagle silhouette wall art with spread wings"
Produces a bold eagle design with fully extended wings, viewed from the front. The silhouette style creates a strong, recognizable shape that works well as a standalone wall piece. The wingspan gives the design a wide aspect ratio that looks good above a doorway or on a garage wall.
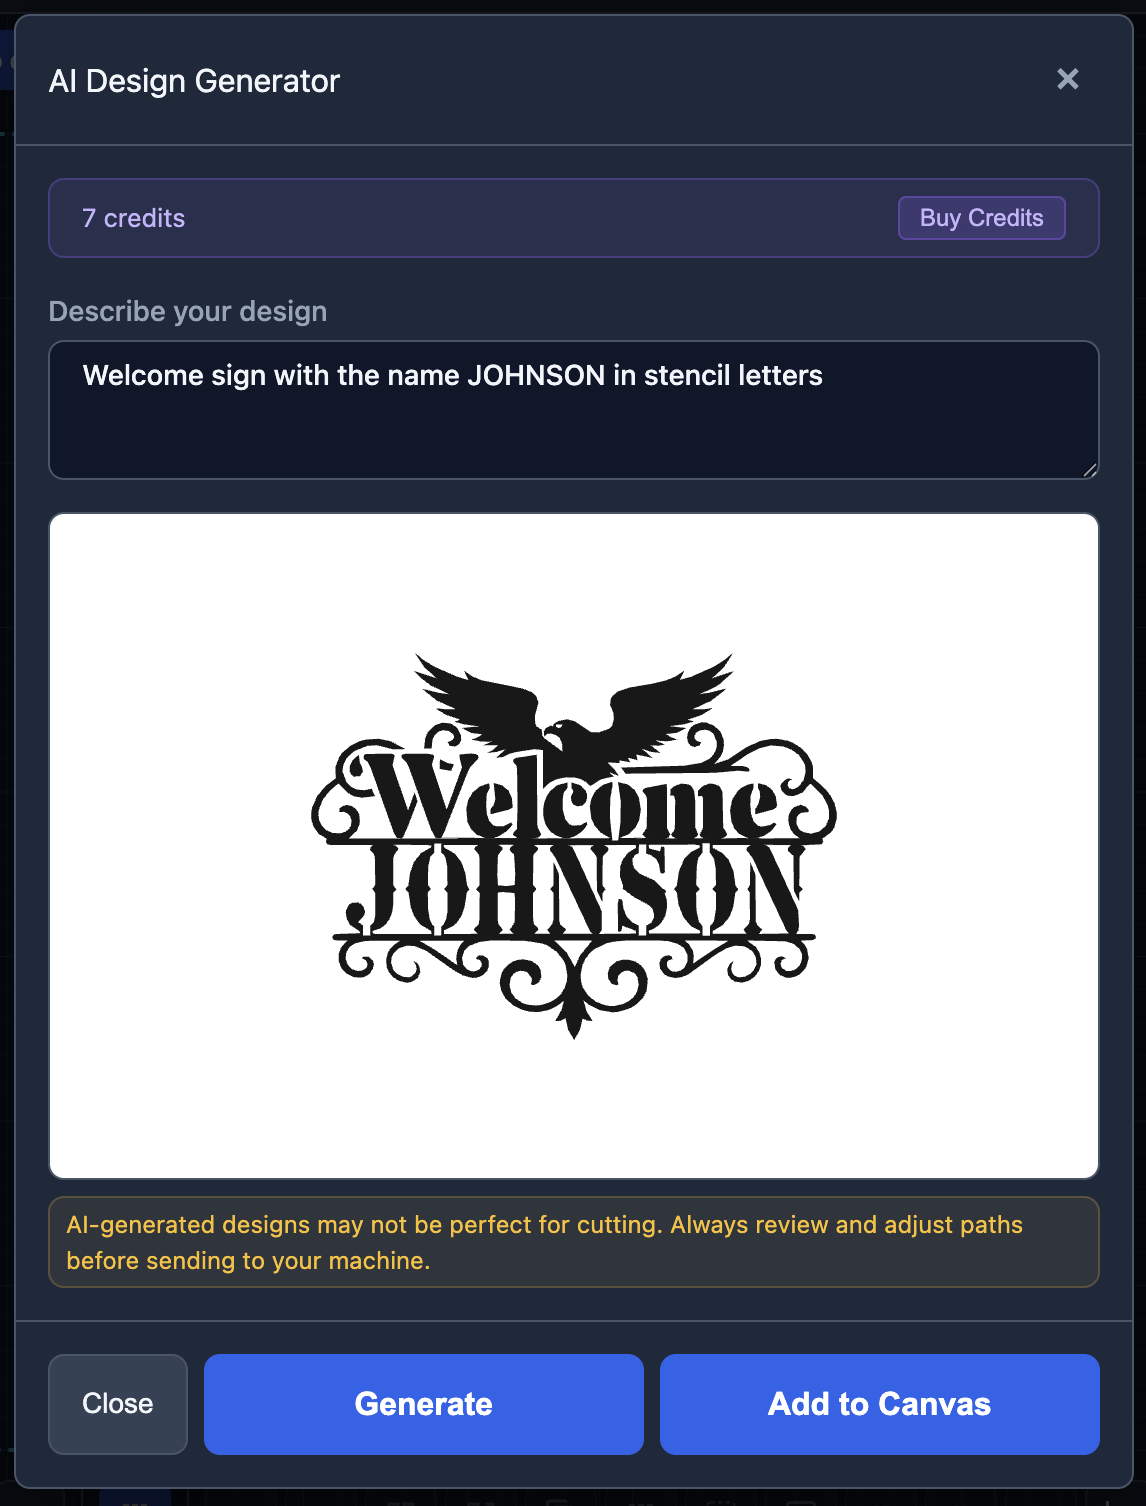
"Welcome sign with the name JOHNSON in stencil letters"
Generates a rectangular or arched sign layout with "Welcome" as a header and "JOHNSON" as the prominent name. All text uses stencil-style lettering with bridges so enclosed letter shapes stay intact after cutting. This is one of the most popular use cases — custom family name signs are a staple of plasma cutting businesses.
"Celtic knot circular pattern"
Creates an interlocking Celtic knot design within a circular boundary. The interwoven pattern is rendered as a continuous silhouette with the negative space forming the knot's over-under pattern. These designs look striking in metal but can have thin sections, so check bridge widths carefully before cutting.
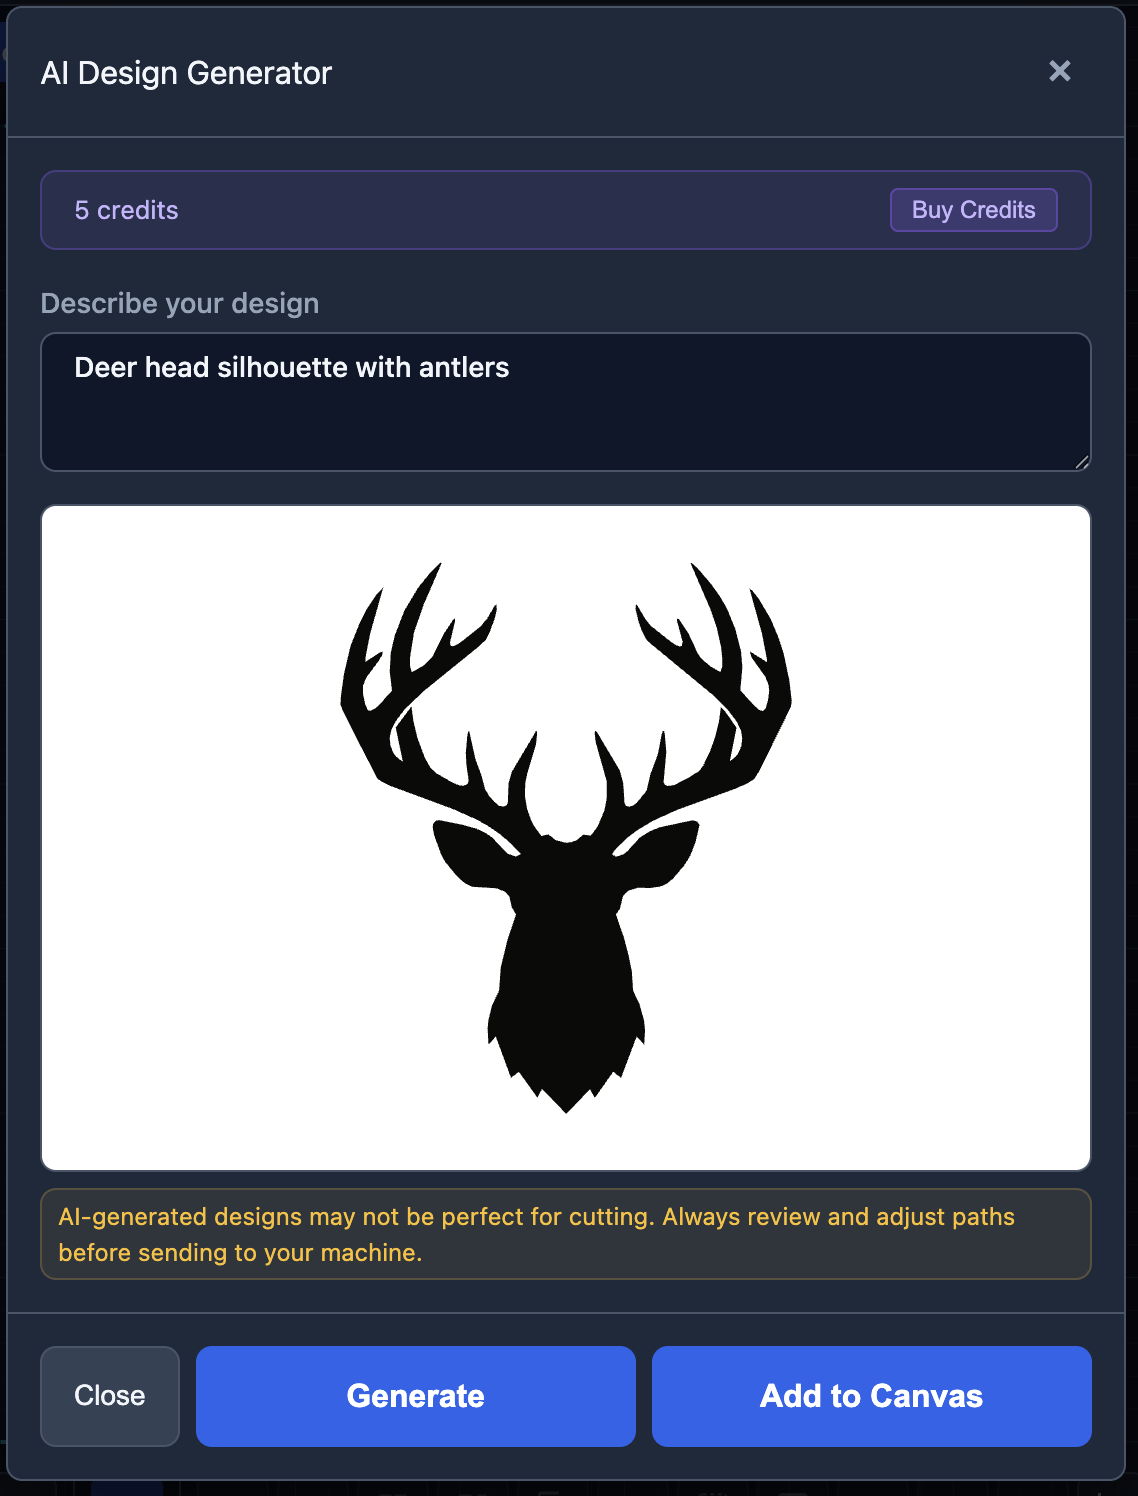
"Deer head silhouette with antlers"
Produces a front-facing or profile deer head with prominent antlers. The antler tines create the visual interest in this design. Be mindful that antler tips can be thin — you may need to thicken the tips slightly for reliable cutting, especially in thin gauge material.
"House number sign with 742"
Generates a clean address sign featuring the numbers 742 in a bold, stencil-style font. The numbers are large and legible, typically presented within a simple border or on a rectangular plate shape. Great for custom house number plaques that mount to a wall or post.
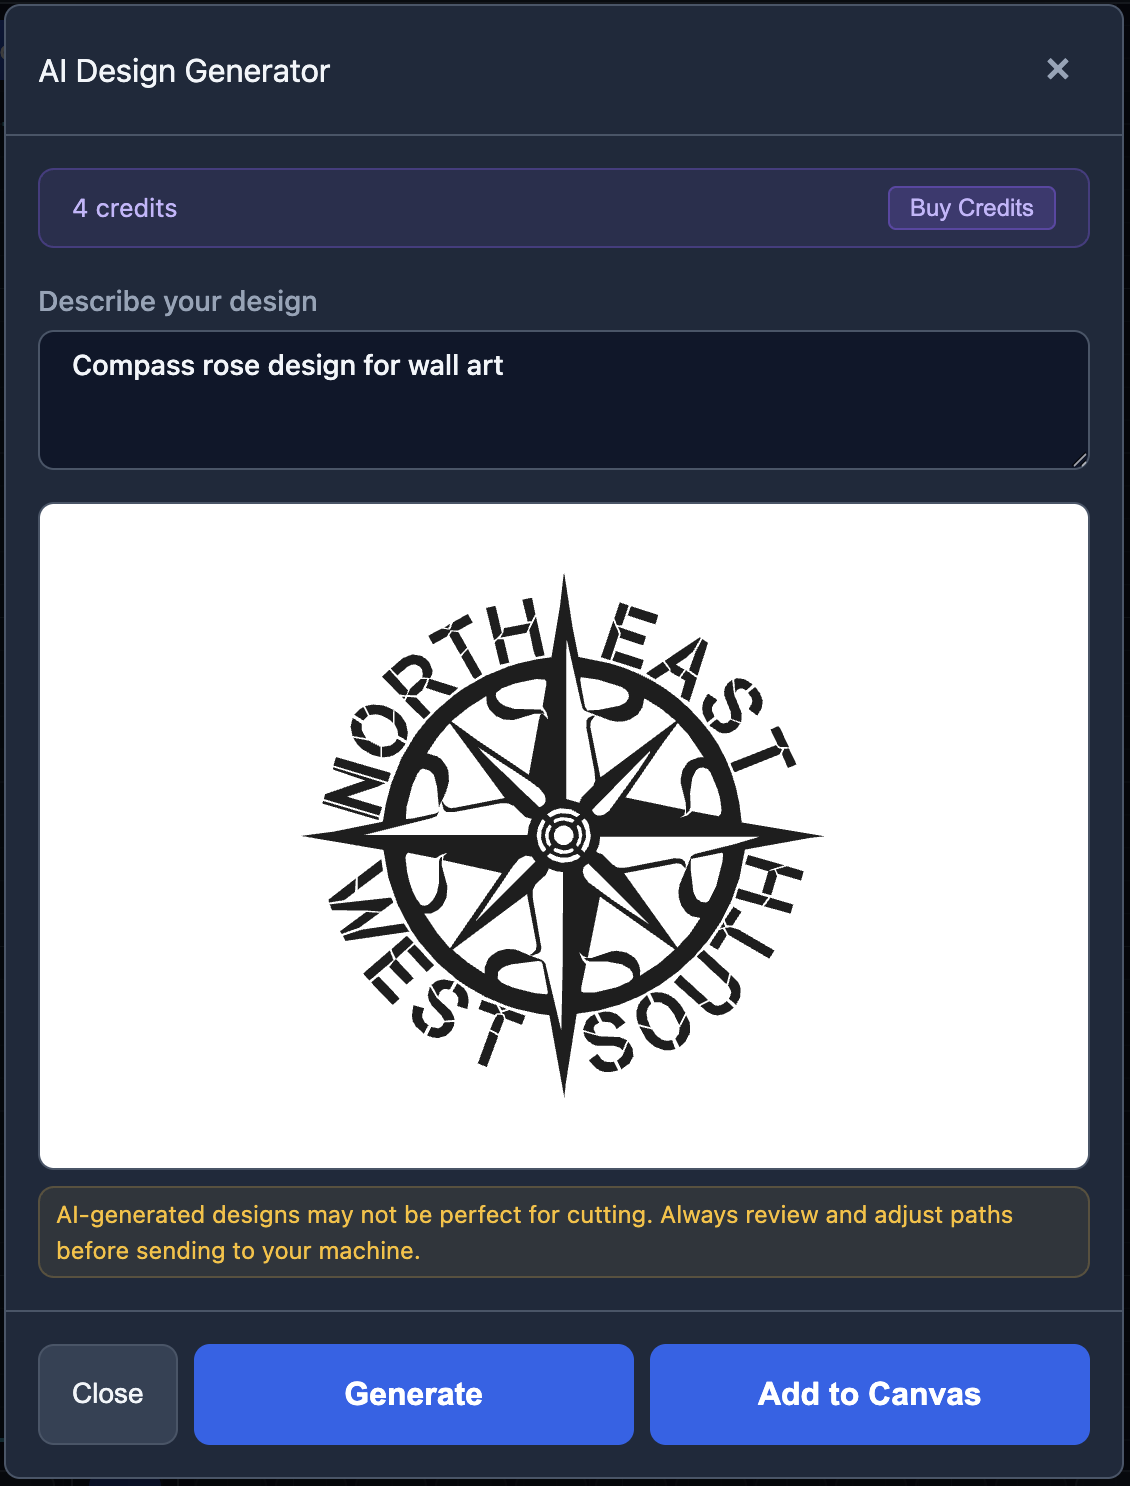
"Compass rose design for wall art"
Creates a traditional compass rose with directional points (N, S, E, W) and decorative intermediate points. The geometric nature of compass roses makes them well-suited to plasma cutting — lots of clean angles and symmetrical shapes. These work particularly well as larger wall pieces where the detail has room to breathe.
"Mountain landscape silhouette"
Produces a layered mountain range silhouette, often with a treeline in the foreground. The design reads as a landscape scene rendered in a single continuous cutout. The layered peaks create depth even in a flat material. This style of design is popular for cabin decor, outdoor-themed signs, and gifts for hikers.
Getting the Most Value from Your Credits
Whether you're using your free weekly credit or a purchased pack, here are a few strategies to maximize the return on each generation.
Draft your prompt before opening the generator. Think through what you want, write it down, and refine the wording before you click Generate. This avoids wasting a credit on a half-formed idea.
Start with your most important design. If you have one free credit this week, use it on the project that matters most — not on an idle experiment. Save experimentation for when you have purchased credits to spend.
Learn from each generation. If a result isn't what you expected, analyze what went wrong. Was the prompt too vague? Did you forget to specify a style? Each generation teaches you something about how the AI interprets prompts, which makes your next attempt more likely to succeed.
Edit rather than regenerate. If a generated design is 80% right, it's often faster and cheaper to fix the remaining 20% with CutArc's editing tools than to spend another credit trying to get a perfect result from scratch.
Save designs you like. When the AI produces a result you're happy with, save the project. You can reuse and modify that design for future projects without spending additional credits.